Project Page: http://hansnewbie.github.io/MyFirstApp/
Feel Good has been updated (a while ago actually, but I just remembered to write the post)! Now there are 4 messages that could appear. If you have suggestion for other messages, leave a comment on this post!
Note: Download link (the APK) is available in the Project Page as well!
Monday, May 27, 2013
Saturday, May 18, 2013
Feel Good #0
Topic:
Feel Good
Project Page: http://hansnewbie.github.io/MyFirstApp/
Actually, I made this app before the calculator. Anyway, this is a modified version of Android MyFirstApp tutorial. Screenshots below:
Actually, I made this app before the calculator. Anyway, this is a modified version of Android MyFirstApp tutorial. Screenshots below:


Basically, type in your names, and a message would pop out. The app name is Praise Yourself, but it sounded not so nice, so in the next version, I will change the name to Feel Good. In the update, I would also enable randomization of the message.
Friday, May 17, 2013
Android Calculator #0
Topic:
Android Calculator

Several problems I met:
- Designing the buttons is not easy. Some decisions needed: which key layout do I want to use; which implementation of Android Layout do I want to use
- How to handle when the button is pressed. I tried to utilise something like the Android Beginner tutorial, but it was very different thus I needed to find something else.
- How to handle the calculation
Then, I found a tutorial -.- I will try to follow the tutorial soon. Hope I could fix my calculator.
Thursday, May 9, 2013
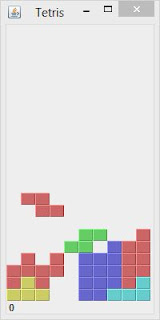
Tetris
Topic:
Tetris
Project Page: http://hansnewbie.github.io/Tetris-in-Java/
Why did I pick that tutorial?
Why did I pick that tutorial?
I was using Java (and started to learn it) this semester for my programming module. Since I would like to make some games, I was looking for making something graphical in Java. I thought it would be hard since I always use Eclipse IDE and I don't think it would support making a graphic output like HTML5 Canvas. So I tried looking for simple game (not like those current console and PC games) in Java, and that's when I found the tutorial. It was interesting, learning Java Swing, though in the end I matched my code with the given code (I retyped the code and tried to optimised here and there, but in the end it didn't work, so I matched back D: ).
Why did I have the idea of doing stuff outside school work when that time was crucial deadlines time?
Simply said, at least it is better than spending my time on Facebook when I can't focus.
Screenshot
My Use of Java Swing
Apparently, in my programming class, there was this problem set on solving mazes. However, the mazes look like this:


On the maze above, we were asked to implement the maze with superpower of going through some wall. The broken wall is marked by XX (we need to implement the XX marking by ourselves while the maze printer for ## and PP was given). The two mazes pictures are of the same maze, with the previous one without superpower and this one with superpower of 5 (means can go through 5 walls).
So, naturally, there was a bonus question on the problem set to implement a better visual for the maze for 0 points. Well, I paused for a second and was thinking, would implementing better visual worth the 0 bonus points? Apparently, since I could reuse the code from the Tetris (though need more than just copying), I implemented the better visual (despite pressing homework, because making better visual is much more fun than doing my other homework). The result?
On the left is solving the maze without superpower while on the right is the one with superpower, with the maze and the source and destination points being the same as the ASCII maze above. Dots mark the path, blue blocks mark the walls and yellow blocks mark the destroyed wall. Quite neat, eh?
Apparently, it seems my tutor gave me some extra points for implementing this, not sure by mistake or not. Either way, it was fun :)
I had a trouble, though; there was another bonus question which has some marks allocated for it, and that is to generate the maze. I had brain freeze due to the piling homework that I could not implement it even though the algorithm is very much available on the Internet. :(
Why did I have the idea of doing stuff outside school work when that time was crucial deadlines time?
Simply said, at least it is better than spending my time on Facebook when I can't focus.
Screenshot

My Use of Java Swing
Apparently, in my programming class, there was this problem set on solving mazes. However, the mazes look like this:

On the maze above, ## means a wall, while PP is the path from the source (which in this case was (0,0)) to the destination (3,3). But when I saw the question, the printed maze was very confusing. And indeed, some people in the class had the same confusion as me.

On the maze above, we were asked to implement the maze with superpower of going through some wall. The broken wall is marked by XX (we need to implement the XX marking by ourselves while the maze printer for ## and PP was given). The two mazes pictures are of the same maze, with the previous one without superpower and this one with superpower of 5 (means can go through 5 walls).
================================
So, naturally, there was a bonus question on the problem set to implement a better visual for the maze for 0 points. Well, I paused for a second and was thinking, would implementing better visual worth the 0 bonus points? Apparently, since I could reuse the code from the Tetris (though need more than just copying), I implemented the better visual (despite pressing homework, because making better visual is much more fun than doing my other homework). The result?
 |  |
On the left is solving the maze without superpower while on the right is the one with superpower, with the maze and the source and destination points being the same as the ASCII maze above. Dots mark the path, blue blocks mark the walls and yellow blocks mark the destroyed wall. Quite neat, eh?
Apparently, it seems my tutor gave me some extra points for implementing this, not sure by mistake or not. Either way, it was fun :)
I had a trouble, though; there was another bonus question which has some marks allocated for it, and that is to generate the maze. I had brain freeze due to the piling homework that I could not implement it even though the algorithm is very much available on the Internet. :(
Saturday, April 6, 2013
Global Game Jam 2013 - Hallucination of A Night with A Beer Bottle
Project Page: http://hansnewbie.github.io/GGJ2013-Deborah/
I participated in Global Game Jam 2013 in Singapore with a few friends of mine from Game Development Group of NUS. The theme of the jam was heartbeat. Here's a preview of the game:
I had different roles in the team. I wasn't confident of my programming skills so I did the artwork. The base model for the offering statue was made by me (the sprite was made by Sandra). I also made the sprite for the hero when he is sacrificing his HP (the hero and its movement sprite was made by Vanessa). I made the whole thing about the monster. Now, many people in the jam asked me what kind of monster it is. My idea was actually a modified leech. Apparently, it is too gross and too striped to be recognized as a leech.
At some point of the jam, I jumped into some parts of the game programming due to the time constraint that we had and extra programmers were needed (the main programmers were Chunmun and Richard). Notably, I coded the traps' position randomization and the collision detection. They weren't up to my expectation, but they did fine. The game engines were actually made by Richard, and Richard and Chunmun made some other game with that engine before, thus our game developed very fast, just that the many numbers of mechanics involved means extra work was needed.
After our game could run fine, we need to add the sound, because it was a mute game. I made the background music using Soundation, an awesome online free music studio. I made the BGM, but then it sounded to bland, so I added the dubstep bit. Turn down your volume when playing. The sound effect was made by Sandra. I also felt the ruin-kind background image was a little unpleasing on the eye, so I made the grassy plain background.
I participated in Global Game Jam 2013 in Singapore with a few friends of mine from Game Development Group of NUS. The theme of the jam was heartbeat. Here's a preview of the game:
At some point of the jam, I jumped into some parts of the game programming due to the time constraint that we had and extra programmers were needed (the main programmers were Chunmun and Richard). Notably, I coded the traps' position randomization and the collision detection. They weren't up to my expectation, but they did fine. The game engines were actually made by Richard, and Richard and Chunmun made some other game with that engine before, thus our game developed very fast, just that the many numbers of mechanics involved means extra work was needed.
After our game could run fine, we need to add the sound, because it was a mute game. I made the background music using Soundation, an awesome online free music studio. I made the BGM, but then it sounded to bland, so I added the dubstep bit. Turn down your volume when playing. The sound effect was made by Sandra. I also felt the ruin-kind background image was a little unpleasing on the eye, so I made the grassy plain background.
Friday, June 22, 2012
XNA Tutorial: Make a Game in 60 Minutes #2
Hello. This post is the continuation to the previous post on an XNA Tutorial: Make a Game in 60 Minutes.
I have continued from the previous step. Now, there are more problem arising from the tutorial.
Firstly, when the asteroids drifted on top or bottom, the shifting to the other side is smooth. On the other hand, when it happens left to right, you could see the jerking shift. The solution if to change the "if" so that the asteroids will be shifted when they drift more out of the edge and are shifted to more out of the edge as well. I am not sure how to do it smoothly, but I will be doing it roughly. (This amendment will change if you change the viewport resolution or the camera projection setting)
In Asteroid.cs, replace the following:
~~~~~~~~~~~~~~~~~~~~~~~~~~~~~~~~~~~~~~~~~~~~~~
with the following:
~~~~~~~~~~~~~~~~~~~~~~~~~~~~~~~~~~~~~~~~~~~~~~
if (position.X > GameConstants.PlayfieldSizeX + 2000)
You might want to ask why for the if condition it is + and - while for the code called for the condition it is both +. The reason is due to the use of -= and +=. Thus, the value after them should be the same for symmetry.
Another change I implement is on the starting point of the asteroids. If you follow the tutorial, you will see that the asteroids appear more on top half then evenly across the screen. This is because the code states that there is only two values, 0 and 1. If it is 0, it will appear on the center of the screen height while if it is 1, top of the screen height. Those are the top and bottom limit. To make the asteroids also appear on the bottom of the screen height, we need to make the random values called to be -1 and 1 instead of 0 and 1 so as the bottom limit is not the center of the height but the bottom of the screen height.
In Game1.cs, replace the following:
~~~~~~~~~~~~~~~~~~~~~~~~~~~~~~~~~~~~~~~~~~~~~~
(This can be found under private void ResetAsteroids())
with the following:
~~~~~~~~~~~~~~~~~~~~~~~~~~~~~~~~~~~~~~~~~~~~~~
It is actually simple math. If I get 0, it will be multiplied by 2 (= 0) then subtracted by 1 (= -1). If I get 1, it will be multiplied by 2 (= 2) then subtracted by 1 (= 1). I found out how to change the 0 and 1 to -1 and 1 from this page.
I just finished step 3, will continue later. Gotta go to Bandung for this weekend :). Hope this post help you. Oh, and by the way, Windows Phone 8 support C++ language. I am not sure about C# support (this tutorial is in C#), hope it is continued! I am also amateur in terms of understanding the different languages and their compatibilities. Anyway, cheers!
I have continued from the previous step. Now, there are more problem arising from the tutorial.
Firstly, when the asteroids drifted on top or bottom, the shifting to the other side is smooth. On the other hand, when it happens left to right, you could see the jerking shift. The solution if to change the "if" so that the asteroids will be shifted when they drift more out of the edge and are shifted to more out of the edge as well. I am not sure how to do it smoothly, but I will be doing it roughly. (This amendment will change if you change the viewport resolution or the camera projection setting)
In Asteroid.cs, replace the following:
~~~~~~~~~~~~~~~~~~~~~~~~~~~~~~~~~~~~~~~~~~~~~~
if (position.X > GameConstants.PlayfieldSizeX)
    position.X -= 2 * GameConstants.PlayfieldSizeX;
if (position.X < -GameConstants.PlayfieldSizeX)
    position.X += 2 * GameConstants.PlayfieldSizeX;
~~~~~~~~~~~~~~~~~~~~~~~~~~~~~~~~~~~~~~~~~~~~~~
with the following:
~~~~~~~~~~~~~~~~~~~~~~~~~~~~~~~~~~~~~~~~~~~~~~
if (position.X > GameConstants.PlayfieldSizeX + 2000)
position.X -= 2 * GameConstants.PlayfieldSizeX + 4000;
if (position.X < -GameConstants.PlayfieldSizeX - 2000)
    position.X += 2 * GameConstants.PlayfieldSizeX + 4000;
~~~~~~~~~~~~~~~~~~~~~~~~~~~~~~~~~~~~~~~~~~~~~~
You might want to ask why for the if condition it is + and - while for the code called for the condition it is both +. The reason is due to the use of -= and +=. Thus, the value after them should be the same for symmetry.
Another change I implement is on the starting point of the asteroids. If you follow the tutorial, you will see that the asteroids appear more on top half then evenly across the screen. This is because the code states that there is only two values, 0 and 1. If it is 0, it will appear on the center of the screen height while if it is 1, top of the screen height. Those are the top and bottom limit. To make the asteroids also appear on the bottom of the screen height, we need to make the random values called to be -1 and 1 instead of 0 and 1 so as the bottom limit is not the center of the height but the bottom of the screen height.
In Game1.cs, replace the following:
~~~~~~~~~~~~~~~~~~~~~~~~~~~~~~~~~~~~~~~~~~~~~~
(This can be found under private void ResetAsteroids())
yStart = (float)random.NextDouble() * GameConstants.PlayfieldSizeY;
~~~~~~~~~~~~~~~~~~~~~~~~~~~~~~~~~~~~~~~~~~~~~~
with the following:
~~~~~~~~~~~~~~~~~~~~~~~~~~~~~~~~~~~~~~~~~~~~~~
yStart = ((float)random.NextDouble() * 2 - 1) * GameConstants.PlayfieldSizeY;
~~~~~~~~~~~~~~~~~~~~~~~~~~~~~~~~~~~~~~~~~~~~~~
It is actually simple math. If I get 0, it will be multiplied by 2 (= 0) then subtracted by 1 (= -1). If I get 1, it will be multiplied by 2 (= 2) then subtracted by 1 (= 1). I found out how to change the 0 and 1 to -1 and 1 from this page.
I just finished step 3, will continue later. Gotta go to Bandung for this weekend :). Hope this post help you. Oh, and by the way, Windows Phone 8 support C++ language. I am not sure about C# support (this tutorial is in C#), hope it is continued! I am also amateur in terms of understanding the different languages and their compatibilities. Anyway, cheers!
Friday, June 15, 2012
XNA Tutorial: Make a Game in 60 Minutes #1
Hello, everybody. I am following up the previous post by doing the 3D tutorial.
There is the tutorial about a simple asteroid game in XNA. Although the tutorial is for XNA Game Studio 3.1, I found no trouble up to now using XNA 4.0. Click here for the link to the tutorial.
I am still halfway through the tutorial (finished Step 2). I paused because I was looking for a way to make it work with keyboard rather than Xbox controller because I don't have one. If you are trying to do the same thing as me, you could refer below.
In Ship.cs, replace the following:
~~~~~~~~~~~~~~~~~~~~~~~~~~~~~~~~~~~~~~~~~~~~~~
~~~~~~~~~~~~~~~~~~~~~~~~~~~~~~~~~~~~~~~~~~~~~~
with the following:
~~~~~~~~~~~~~~~~~~~~~~~~~~~~~~~~~~~~~~~~~~~~~~
~~~~~~~~~~~~~~~~~~~~~~~~~~~~~~~~~~~~~~~~~~~~~~
In Game1.cs, replace the following:
~~~~~~~~~~~~~~~~~~~~~~~~~~~~~~~~~~~~~~~~~~~~~~
~~~~~~~~~~~~~~~~~~~~~~~~~~~~~~~~~~~~~~~~~~~~~~
with the following:
~~~~~~~~~~~~~~~~~~~~~~~~~~~~~~~~~~~~~~~~~~~~~~
~~~~~~~~~~~~~~~~~~~~~~~~~~~~~~~~~~~~~~~~~~~~~~
I did several changes. I change the reset button from Enter (in previous tutorial) to Space so that I can use Enter to shoot, if I decide to do so. Also, I enable moving backward by pressing S which was not implemented in any of the tutorials.
My job here is done :) Sorry about the colours and indentations. It appears black after copy paste from my Visual Studio. If you got questions, you could post them in comment section. I am still thinking about how to make it work both with gamepad and with keyboard, probably changing the update in Ship.cs to Update(Gametime Gametime), but I am unsure about it. For now, I'll stick with the keyboard. :)
There is the tutorial about a simple asteroid game in XNA. Although the tutorial is for XNA Game Studio 3.1, I found no trouble up to now using XNA 4.0. Click here for the link to the tutorial.
I am still halfway through the tutorial (finished Step 2). I paused because I was looking for a way to make it work with keyboard rather than Xbox controller because I don't have one. If you are trying to do the same thing as me, you could refer below.
In Ship.cs, replace the following:
~~~~~~~~~~~~~~~~~~~~~~~~~~~~~~~~~~~~~~~~~~~~~~
public void Update(GamePadState controllerState)
        {
            // Rotate the model using the left thumbstick, and scale it down.
            Rotation -= controllerState.ThumbSticks.Left.X * 0.10f;

            // Finally, add this vector to our velocity.
            Velocity += RotationMatrix.Forward * 1.0f *
                controllerState.Triggers.Right;
        }
~~~~~~~~~~~~~~~~~~~~~~~~~~~~~~~~~~~~~~~~~~~~~~
with the following:
~~~~~~~~~~~~~~~~~~~~~~~~~~~~~~~~~~~~~~~~~~~~~~
public void Update(GamePadState controllerState)
        {
            //Rotate the model using A and D
            if (keyboardState.IsKeyDown(Keys.A))
                Rotation += 0.10f;
            else if (keyboardState.IsKeyDown(Keys.D))
                Rotation -= 0.10f;

            if (keyboardState.IsKeyDown(Keys.W))
                Velocity += RotationMatrix.Forward * VelocityScale;
            else if (keyboardState.IsKeyDown(Keys.S))
                Velocity -= RotationMatrix.Forward * VelocityScale;
}
~~~~~~~~~~~~~~~~~~~~~~~~~~~~~~~~~~~~~~~~~~~~~~
In Game1.cs, replace the following:
~~~~~~~~~~~~~~~~~~~~~~~~~~~~~~~~~~~~~~~~~~~~~~
protected void UpdateInput()
{
    // Get the game pad state.
    GamePadState currentState = GamePad.GetState(PlayerIndex.One);
    if (currentState.IsConnected)
    {
        ship.Update(currentState);

        //Play engine sound only when the engine is on.
        if (currentState.Triggers.Right > 0)
        {

            if (soundEngineInstance.State == SoundState.Stopped)
            {
                soundEngineInstance.Volume = 0.75f;
                soundEngineInstance.IsLooped = true;
                soundEngineInstance.Play();
            }
            else
                soundEngineInstance.Resume();
        }
        else if (currentState.Triggers.Right == 0)
        {
            if (soundEngineInstance.State == SoundState.Playing)
                soundEngineInstance.Pause();
        }


        // In case you get lost, press A to warp back to the center.
        if (currentState.Buttons.A == ButtonState.Pressed)
        {
            ship.Position = Vector3.Zero;
            ship.Velocity = Vector3.Zero;
            ship.Rotation = 0.0f;
            soundHyperspaceActivation.Play();
        }
    }
}
~~~~~~~~~~~~~~~~~~~~~~~~~~~~~~~~~~~~~~~~~~~~~~
with the following:
~~~~~~~~~~~~~~~~~~~~~~~~~~~~~~~~~~~~~~~~~~~~~~
protected void UpdateInput()
{
            // Get the keyboard state.
            KeyboardState currentKeyState = Keyboard.GetState();


            ship.Update(currentKeyState);

            //Play engine sound only when the engine is on.
            if (currentKeyState.IsKeyDown(Keys.W) || currentKeyState.IsKeyDown(Keys.S))
            {
                    if (soundEngineInstance.State == SoundState.Stopped)
                    {
                        soundEngineInstance.Volume = 0.75f;
                        soundEngineInstance.IsLooped = true;
                        soundEngineInstance.Play();
                    }
                    else
                        soundEngineInstance.Resume();
            }
            else if (currentKeyState.IsKeyUp(Keys.W) || currentKeyState.IsKeyUp(Keys.S))
            {
                    if (soundEngineInstance.State == SoundState.Playing)
                        soundEngineInstance.Pause();
            }


            // In case you get lost, press A to warp back to the center.
            if (currentKeyState.IsKeyDown(Keys.Space))
            {
                    ship.Position = Vector3.Zero;
                    ship.Velocity = Vector3.Zero;
                    ship.Rotation = 0.0f;
                    soundHyperspaceActivation.Play();
            }
}
~~~~~~~~~~~~~~~~~~~~~~~~~~~~~~~~~~~~~~~~~~~~~~
I did several changes. I change the reset button from Enter (in previous tutorial) to Space so that I can use Enter to shoot, if I decide to do so. Also, I enable moving backward by pressing S which was not implemented in any of the tutorials.
My job here is done :) Sorry about the colours and indentations. It appears black after copy paste from my Visual Studio. If you got questions, you could post them in comment section. I am still thinking about how to make it work both with gamepad and with keyboard, probably changing the update in Ship.cs to Update(Gametime Gametime), but I am unsure about it. For now, I'll stick with the keyboard. :)
Tuesday, June 5, 2012
WP7 Game Development Tutorial for Absolute Beginner - Updated
I started following this tutorial when I was looking for Windows Phone 7 (WP7) development for absolute beginner. It was for game development. Still trying to finish it. It is a good tutorial, but you may need to tweak some of it a little bit. If you are a real absolute beginner who never touches programming or scripting, you could go here. It's a slow paced tutorial (I never passed the Day 1 mark) but the guy (Bob Tabor) explains really well for you. Anyway, I will discuss the problems I encountered.
Firstly, the position of the player after a few steps changed. It is no longer at the desired position near the center. It will be a little bit up and to the left. Also, the movement is restricted not to the viewport (viewport is the window of the game) but to the left and to the top of the viewport, like this.
____________________| _________________|___ Red box is the restricted area of movement
| | | | while black box is the viewport.
| | | |
|__|_________________| |
|____________________|
To solve it, you need to look for the code which get the value of the player width and height divided by two. I believe it was meant to fix the aforementioned problem, but probably due to version update or something, it CREATES the problem. What is happening is that previously, probably the program calculate the origin of x and y of the player image at the center of the image, while the real thing is at the top left corner of the image. Thus, the problem. By the way, x-axis in the viewport starts from the left while y-axis from the top.
Secondly, you will find that at the tutorial about collision, there is a problem. Sometimes your projectile missed and I can't remember the other problem (I think the starting position of the projectile is wrong). Same problem as above. You need to find out which vector values are wrong. The enemy's rectangle is too high, delete the value of its height divide by 2. If you think the rectangle of the projectile is too to the left, don't, or your projectile will be gone before it touches the enemy's image (when the projectile's image enters the enemy's rectangle but does not touch the enemy's image yet, it is not removed).
Thirdly, after you reach the tutorial about explosion, you will find that the explosions occurs not at the center of the enemy image, but rather at the bottom right corner of the enemy image. I am still figuring out how to fix it, be patient :)
I don't know if the problem is because of the program's version in my computer, but if you encounter the same problems, there you go. :)
And for the record, I am a beginner, although not absolute.
*Update 1:
Seems that the link to the tutorial is gone. I will try too look into it again. If you have any idea where it goes to, could you help me by posting it in the comment? Thanks.
*Update 2:
Okay. I found the link to the tutorial: http://channel9.msdn.com/Blogs/The-XNA-Show/XNA-Game-Development-Intro and http://channel9.msdn.com/Blogs/The-XNA-Show?page=2 . However, it seems that the written tutorial is gone. Can't do much about it. One comment states just go to create.mdsn.com and find the game tutorial there, but I could not find it.
Subscribe to:
Posts (Atom)